#1 Low Carb & Keto Diet App Since 2010
Track macros, calories, and access top Keto recipes.


prep time

15 min
cook time
0 min
ready time
15 min
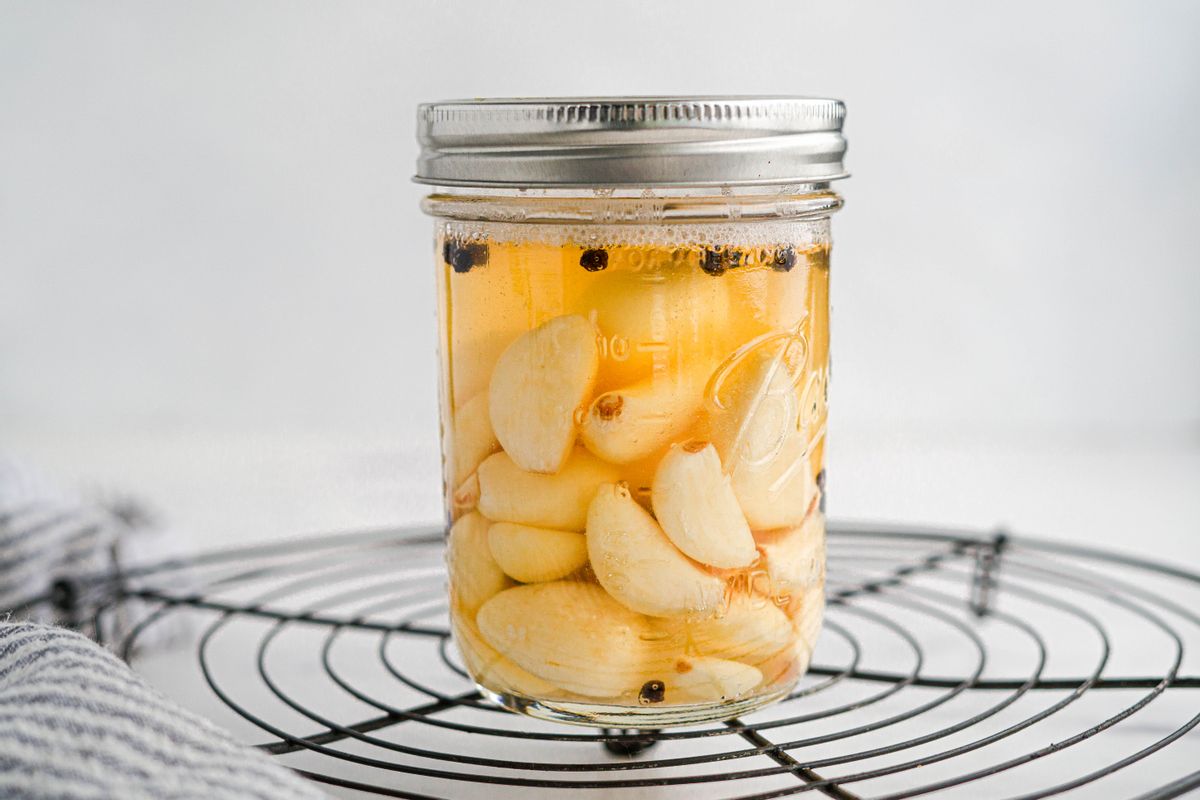
Fermented Garlic
Garlic is easily one of the most delicious and versatile foods. Its flavoring is used in many cuisines around the world. It is a good source of antioxidants like selenium, manganese, Vitamin C and Vitamin B-6. It also has known antibacterial properties to help boost the immune system. However, Lacto-fermenting the garlic gives it even more benefits! How is this possible? Fermentation makes the nutrients in the garlic even more bioavailable. It may sound complicated to ferment garlic, but it is incredibly easy to do. Fermented garlic will be a great first fermentation recipe if you are new to fermenting foods. It only requires a few ingredients too!
What is the best type of garlic to use?
The best type of garlic to use is fresh garlic or pre-peeled garlic. We have used pre-peeled garlic here for ease of preparation. If using fresh garlic, place the side of a knife on the garlic clove and gently tap the knife. Doing so will activate enzymes in the garlic skin, releasing the clove from the skin and making it easy to peel.
How long does it take to ferment?
The entire process of fermenting garlic takes about one month. If you would like an even more mellow flavor, allow it to ferment for about two months. When you decide it is done fermenting, be sure to keep the lid on tightly and refrigerate the jarred garlic.
Do I have to add the seasonings?
No, the bay leaf and black peppercorns are purely optional. They add a nice mellow flavor and are nice to look at in the jar, but they can be omitted.
Issues in fermentation
First of all, fermented vegetables are very safe. The acid created during fermentation creates good bacteria, which eliminates the bad bacteria. However, you will know if your Lacto-fermented garlic has failed. If it smells bad, has mold, or has any strange colors that have appeared…toss it.
If there is a white layer on the surface of the garlic, this is most likely Kham yeast. This yeast is safe. However, it can alter the taste. If this happens, skim it off and place the entire jar in the fridge. Keeping your fermented garlic in a dark, cool place will prevent this from happening.
However, if there is hairy mold on the surface that is white, black, or green, you must toss the garlic. Mold means that the garlic has been in contact with oxygen, which is why it is critical to ensure there is enough brine to cover the garlic before storing it to ferment.
If the brine has evaporated for any reason and it has been less than three days, you can open the jar and top it with fresh brine solution.
What is the recipe for the brine? How can I use it to adjust the amount I make?
The brine is a 2% salt solution. To make it, weigh out any amount of water in grams and multiply that number by 0.02 to get the amount in grams of salt you need to add. Add the salt and mix it to dissolve the salt. Use this mixture to pour over the garlic. You can adjust this amount to however much you need if making a larger batch.
If you see white deposits at the bottom of the jar, this is also normal. In Lacto-fermentation, everything that occurs below the surface of the salt brine is safe!
To make the ultimate pairing, serve this with other moderate carb recipes like our Keto Avocado, Tomato, and Goats Cheese Spread as a part of a delicious Keto charcuterie board.
Net Carbs
5.3 g
Fiber
0.4 g
Total Carbs
5.8 g
Protein
1.1 g
Fats
0.1 g
26 cals
#1 Low Carb & Keto Diet App Since 2010
Track macros, calories, and access top Keto recipes.
Ingredients
Garlic
6 oz
Water
1 cup
Coarse Kosher Salt
1.25 tsp
Bay Leaf
1 leaf
Whole peppercorns, Black
1 tsp


Recipe Steps
steps 3
15 min
Step 1
Place the peeled garlic in a pint-sized glass jar. Feel free to use pre-peeled garlic or peel your own garlic. If using fresh garlic, place the side of a knife on the garlic clove and gently tap the knife. Doing so will activate enzymes in the garlic skin, releasing the clove from the skin and making it easy to peel.Step 2
Make the brine. To make the brine, combine warm water with salt. We have included the measurements here in cups and teaspoons. However, it is best to make brine based on weight. Weigh out any amount of water in grams and multiply that number by 0.02 to calculate the amount in grams of salt you need to add. Add the salt and mix it to dissolve the salt. Use this mixture to pour over the garlic. You can adjust this amount to however much you need if making a larger batch.Step 3
Place the lid on the garlic. Store the garlic in a cool dark place. Make sure to “burp” the garlic every day to release pressure. It may take a few days to a few weeks to start seeing bubbles in the brine. When the fermentation is ready, the brine should be golden-brown in color.


