#1 Low Carb & Keto Diet App Since 2010
Track macros, calories, and access top Keto recipes.


prep time

9 h 30 min
cook time
15 min
ready time
9 h 45 min
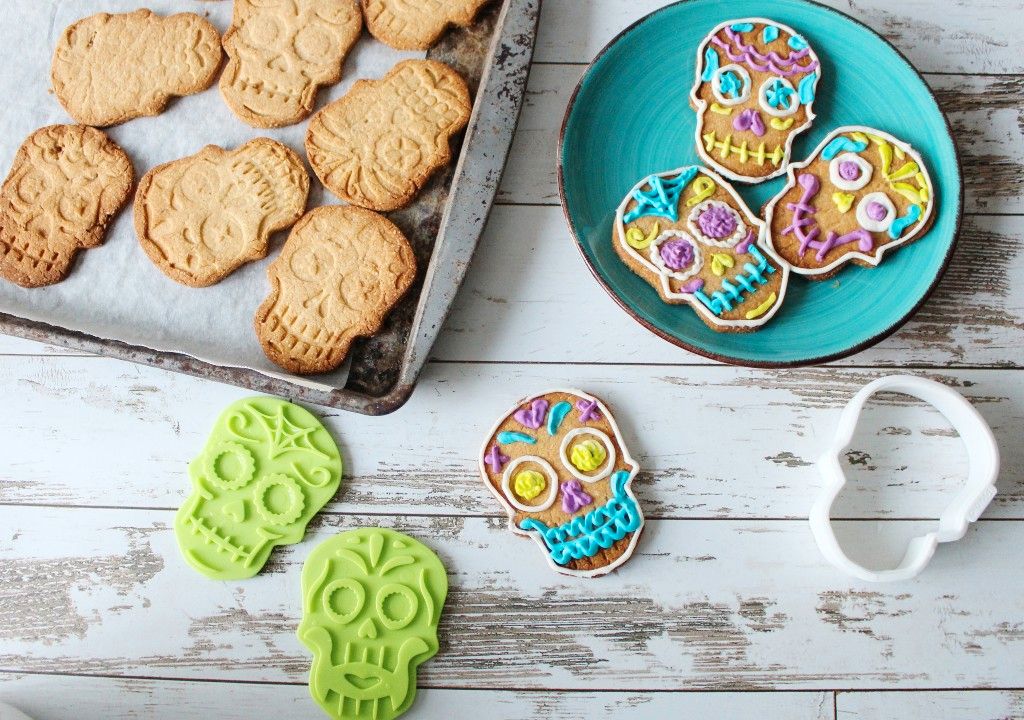
Keto Sugar Skull Sugar Cookies
The perfect treat to celebrate the Day of the Dead, Halloween, or other fun holidays are these Keto sugar cookies. Modeled after Mexican sugar skulls, these sugar cookies are decorated in festive colors and eccentric patterns. The cookies are made from a fluffy blend of almond and coconut flour. They have the same texture as classic sugar cookies: a lightly golden sugared rim for a light and crisp bite that ends in a more tender center. With your own creative touch, each cookie is decorated in creamy icing to complete this Keto Day of the Dead recipe. When it seems like everyone else around you is indulging in a seasonal tradition of eating starchy and sweetened foods, don’t miss out on the fun! These Keto cookies will satisfy a sweet tooth.
What Is A Sugar Skull?
The symbol of a skull is the perfect representation of what the Day of the Dead is all about. Many traditional celebrations of the holiday include all sorts of candies and desserts depicting the skull symbol, most notably sugar skulls. Sugar skulls are literally made of sugar and decorated with the iconic bright colors and bold patterns of popular Mexican cultures. Creating these fun designs on Keto sugar cookies is a great activity to share with kids or friends.
Keto Icing Tips
You can use the icing recipe here just like royal icing that’s used on the sugar cookies you see in bakeries. Keep the icing in the refrigerator for firm decorator’s icing. You can use piping tips to decorate cookies like you would a cupcake. If you want to fill cookies with thin icing, briefly microwave the Keto icing to melt it. While it’s warm, pour it in between lines of firm icing and use a toothpick to spread it around. Keep the cookies in your refrigerator to make sure the icing sets in place.
Net Carbs
2.5 g
Fiber
2.8 g
Total Carbs
8.3 g
Protein
3.6 g
Fats
17.3 g
189 cals
#1 Low Carb & Keto Diet App Since 2010
Track macros, calories, and access top Keto recipes.
Ingredients
Butter, unsalted
8 tbsp
Powdered Erythritol (Icing Sugar)
2 tbsp
Raw egg, yolk
1 large
Vanilla extract
0.5 tsp
Almond milk
1 tsp
Liquid stevia
15 Drop
Almond flour
1 cup
Coconut flour
0.5 cup
Baking Aids Xanthan Gum
0.5 tsp
Baking soda
0.5 tsp
Baking powder
0.25 tsp
Cream cheese
4 oz
Cream Heavy Whipping
1.5 tbsp
Powdered Erythritol (Icing Sugar)
2 tbsp
Vanilla extract
0.5 tsp


Recipe Steps
steps 5
9 h 45 min
Step 1
Use a paddle attachment on a stand mixer to blend the butter until it’s creamy and smooth. You can use a spatula to scrape down the sides of the bowl and continue mixing multiple times until the butter is totally lump-free. Mix the powdered erythritol into the butter. Once the butter and sugar are creamed, blend in the egg yolk, vanilla extract, almond milk, and liquid stevia. In a separate bowl, sift together the almond flour, coconut flour, xanthan gum, baking soda, and baking powder. Blend the dry mixture into the wet ingredients until the soft cookie dough comes together.Step 2
Transfer the cookie dough to a piece of plastic wrap and press the dough into a flat disc. Wrap the dough and store it in your refrigerator for 60 minutes to chill. Meanwhile, make the icing you’ll use to decorate the cookies. Clean out your mixing bowl and return it with the paddle attachment to your stand mixer. Blend room temperature cream cheese until it’s soft and lump-free. Blend the remaining heavy cream, powdered erythritol, and vanilla extract into the cream cheese to make a soft and creamy icing.Step 3
Store the icing next to your dough in the refrigerator to stay firm until decorating time. When you’re ready to cut the cookies, you’ll need a cookie cutter to make the correct shape. You’ll need a skull-shaped cookie cutter, or you can use a kit like the one photographed. A sugar skull cookie cutter kit will include decorated presses with designs you can imprint on the cookies. Additionally, you’ll need different shades of food coloring to dye the icing in festive and vibrant colors. Try to dye the icing in 3-4 different colors to create the right look.Step 4
Turn on an oven to preheat to 350 degrees and line a baking sheet with parchment paper. Remove the cookie dough from your refrigerator and place it on a floured sheet of parchment paper or on a Silpat mat, if you own one. Roll the dough out into a ¼” sheet, and use the decorated presses to mark out your cookies (if you’re using them). Then, use the skull-shaped cookie cutter to cut out the cookies. This dough should have almost a playdough consistency, so you can re-roll and cut the dough multiple times until you use it all up.Step 5
Transfer the cookies to your lined baking sheet and bake the cookies in your oven for 12-15 minutes. Just like regular sugar cookies, look for tender centers and golden edges all around the cookies. Before you can decorate the sugar skull cookies, they need to cool fully overnight or for at least 8 hours. Once the cookies are cooled, you can decorate the cookies by filling icing bags or Ziploc bags with the corner cut off with your different colored icings. Follow the patterns you imprinted on the cookies or make up your own designs to decorate with the icing.


